Modern app sample
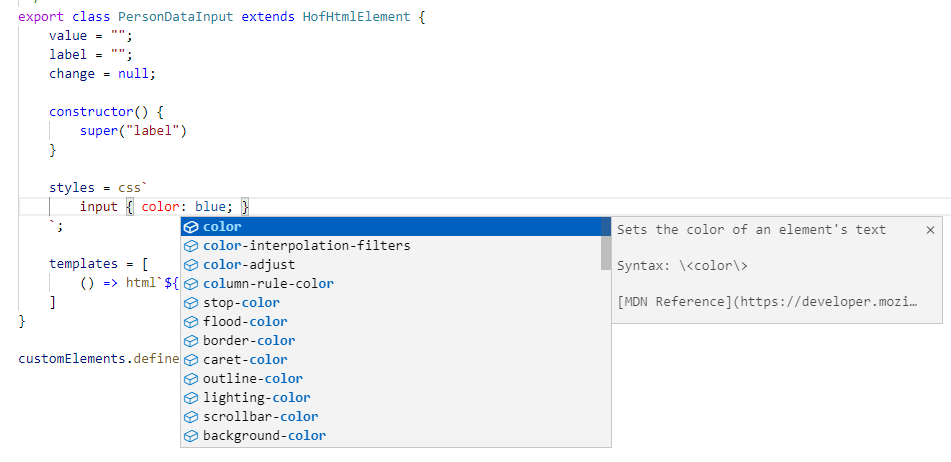
To support autocomplete and syntax highlighting, we need to do the following things:
- Use tagged template literals
html`htmlMarkup`andcss`cssStyles`instead of pure template literals such as`htmlOrCss`within propertiestemplatesandstylesof your HofHtmlElement component. - Create a separate js file for any HofHtmlComponent and use ES modules to import required components and export component classes.
Lets update our person list app from earlier to use modular js.
person-list-app.html
<!DOCTYPE html>
<html>
<head>
    <title>Hello world app</title>
    <script type="module" src="app-content.js"></script>
</head>
<body>
    <h1>Hello world app</h1>
    <p>This app has to be served with a web server such as Vscode live server to support js modules.</p>
    <app-content></app-content>
</body>
</html>
Important:
- We only include one JavaScript file via
scripttag and usemoduleas value fortype. For this feature, however, the web page must be provided by a web server. - We now reference an
app-contentcomponent as the root element for our whole app.
app-content.js
import { HofHtmlElement, item, html } from "../../lib/esm/hof.js"
import "./person-data.js";

export class AppContent extends HofHtmlElement {
    templates = [
        () => html`<person-data></person-data>`
    ]
}

customElements.define("app-content", AppContent);
Important:
- We created a component
AppContent. Here, it only renders aperson-datacomponent. In practice, it could include the structure of the whole body of a webpage. - We explicitly import required classes and other HofHtmlElement components.
- We export this class to make it available for other classes and the including webpage.
- We use
htmltagged template to render html. Please note that you get autocomplete and syntax highlighting withinhtml. You also get code documentation attached toperson-data.

person-data.js
import { HofHtmlElement, item, html } from "../../lib/esm/hof.js"
import { Person } from "./person.js"
import "./person-input.js"
import "./person-list.js";

/**
 * Renders a ui to manage a list of persons, e.g. to add, update and delete persons of a list.
 */
export class PersonData extends HofHtmlElement {
    selected = new Person();
    persons = [new Person("Alex", 21), new Person("Chris", 19), new Person("Mike", 19)];

    create() { this.selected = new Person(); }
    edit(person) { this.selected = { ...person }; } // Copy object to avoid live update on text change
    remove(person) { this.persons.splice(this.findIndex(person), 1); this.create(); }
    save() {
        if (this.selected.id) // Existing person?
            this.persons.splice(this.findIndex(this.selected), 1, this.selected);
        else
            this.persons.push(new Person(this.selected.name, this.selected.age));

        this.create();
    }
    findIndex(person) { return this.persons.findIndex(p => p.id == person.id);  }

    templates = [
        () => html`
            <fieldset><test></test>
                <person-data-input label="Name" value="${this.selected.name}" change="${(e) => this.selected.name = e.target.value}"></person-data-input>
                <person-data-input label="Age" value="${this.selected.age}" change="${(e) => this.selected.age = e.target.value}"></person-data-input>
                <button onclick="${this.save}">Save</button>
            </fieldset>

            ${this.persons.length} persons in list
            <person-data-list persons="${this.persons}" edititem="${this.edit}" deleteitem="${this.remove}"></person-data-list>

            <a href="#" onclick="${this.create}">Create</a>
        `
    ]
}

customElements.define("person-data", PersonData);
Important:
- We imported required components and exported our component
person-data. - We used
htmlto enable syntax highlighting and autocomplete. Please note that you get autocomplete and syntax highlighting including infos about supported properties of our component such as label and value. You also get code documentation attached toperson-input.

Note
This framework currently does not support direct referencing of imported entities within templates. This means that you can only reference elements of the component class by using
thisor reference elements of global scope without any prefix. However you can access any imported elements from within functions defined in your component class.
person-input.js
import { HofHtmlElement, item, html, css } from "../../lib/esm/hof.js";

/**
 * Renders a label and a corresponding input field.
 * @attr value - Editable value.
 * @attr label - Label for input field.
 * @attr change - Event handler that is fired after used changed value.
 */
export class PersonDataInput extends HofHtmlElement {
    value = "";
    label = "";
    change = null;

    constructor() {
        super("label")
    }

    styles = css`
        input { color: blue; }
    `;

    templates = [
        () => html`${this.label}: <input value="${this.value}" onchange="${this.change}" />`
    ]
}

customElements.define("person-data-input", PersonDataInput)
Important:
- We imported required components and exported our component
person-input. - We added jsdoc for our properties. Currently it is required to add an
@attrentry for each of the component attributes to make autocomplete work in other js files that use this component. In the future, the lit-plugin extension may be able to detect this automatically. - We used
htmlto enable syntax highlighting and autocomplete for html. - We used
cssto enable syntax highlighting and autocomplete for css.

person-list.js
import { HofHtmlElement, item, list, html } from "../../lib/esm/hof.js";

/**
 * Renders a list of persons with links to edit and delete a person
 * @attr persons - List of persons.
 * @attr edititem - Callback that is fired if a link to edit a person is clicked.
 * @attr deleteitem - Callback that is fired if a link to delete a person is clicked.
 */
export class PersonDataList extends HofHtmlElement {
    persons = [];

    edititem = null;

    deleteitem = null;

    templates = [
        list(this.persons, (person) => html`
            <li>
                ${person.name} - ${person.age} years)
                [<a href="#" onclick="${() => this.edititem(person)}">Edit</a>]
                [<a href="#" onclick="${() => this.deleteitem(person)}">Delete</a>]
            </li>`
        )
    ];
}

customElements.define("person-data-list", PersonDataList)
Important:
- We imported required components and exported our component
person-list. - We added jsdoc for our properties.
- We used
htmlto enable syntax highlighting and autocomplete for html.
Rendered webpage
And that’s it.
You have just updated your app to modular js and enabled support for a great developer experience with Hof.js!
Note
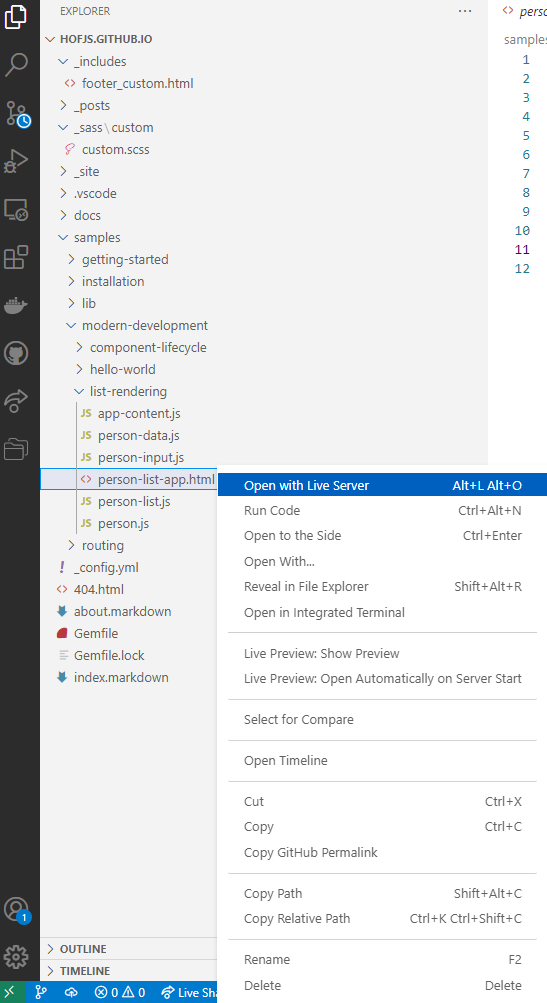
JavaScript modules require all files to be served from a webserver. For development purposes you can use vscode live server by opening the context menu for the html file of a Hof.js app in vscode an choosing
Open with Live Server.
